利用VCF文件构建系统发育树
## 导读本文将介绍三种使用`VCF`文件,构建系统发育树的方法,包括程序的安装,使用,已及系统发育树的可视化与美化。
## 1. VCF2Dis
(https://github.com/BGI-shenzhen/VCF2Dis "VCF2Dis")是一种新的简单高效的软件,用于计算基于`VCF`格式的距离矩阵
### 1.1. 安装
```sh
# 下载
wget -c https://github.com/hewm2008/VCF2Dis/archive/v1.47.tar.gz
# 解压
tar -zxvf v1.47.tar.gz
# 进入程序目录
cd VCF2Dis
# 编译
make ; make clean
# 测试运行
./bin/VCF2Dis
```
### 1.2. 距离矩阵
- 利用`VCF2Dis`生成距离矩阵
```sh
VCF2Dis -i test.vcf -o test.mat
```
### 1.3. mat2nwk
- 文件转换
!(https://swindler-typora.oss-cn-chengdu.aliyuncs.com/typora_imgs/image-20221003234817571.png)
上传距离矩阵到在线网站, (http://www.atgc-montpellier.fr/fastme/ "FastMe2.0")。上传以后,选择`Data type`为`Distance matrix`。 然后根据自己的需要进行配置,最后填入任务名称和`Email`来获取结果通知。
- 结果下载
点击下载结果

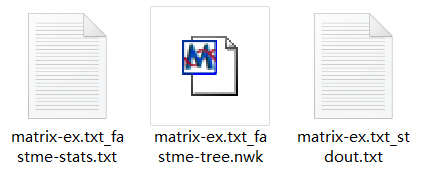
结果文件是一个压缩文件,里面包含:
1. 一个`.nwk`文件用于进化树可视化

2. `stats.txt`
```
记录了文件转换过程中,选择的参数
```
3. `stdout.txt`
```
转换过程中的日志文件,记录了程序的运行过程
```
### 1.4. iTOL美化
>> 十分推荐利用`iTOL`对进化树进行美化,该程序是网页版,配置简单,结果十分漂亮。
>>
- 导入(https://itol.embl.de/ "iTOL")美化
!(https://swindler-typora.oss-cn-chengdu.aliyuncs.com/typora_imgs/image-20221003234417836.png)
## 2. Phylip
(https://evolution.genetics.washington.edu/phylip.html "PHYLIP 是用于推断系统发育的*免费*程序包。")是用于推断系统发育的免费程序包。
### 2.1. 安装
- 源码编译安装
```sh
# 下载PHYLIP
wget -c http://evolution.gs.washington.edu/phylip/download/phylip-3.697.tar.gz
# 解包
tar zxf phylip-3.697.tar.gz
# 进入程序文件夹
cd phylip-3.695/src/
# 复制文件
cp Makefile.unx Makefile
# 编译
make install# 可能需要sudo 权限
```
- `conda`安装
```sh
# 新建phylip环境,并安装phylip
conda create -n phylip -c bioconda phylip -y
```
### 2.2. 格式转换
- 转换脚本下载
```sh
# 下载
wget -c https://github.com/edgardomortiz/vcf2phylip/archive/refs/tags/v2.8.zip
# 解压
unzip v2.8.zip
```
- 转换为`PHYLIP matrix`
```sh
python vcf2phylip.py -i test.vcf
# PHYLIP matrix是默认格式,不同输出格式,见下参数
# -f FASTA matrix
# -n NEXUS matrix
# -b binary NEXUS matrix
```
>> 注意:test.vcf中的样本名一定要少于10个字符,否则会报错
>>
### 2.3. 建树
- 构建配置文件
1. seqboot.par
```sh
test.phy# 本程序的输入文件
R # 选择bootstrap
100 # 设置bootstrap的值,即重复的replicate的数目,通常使用1000或者100,注意此处设定好后,后续两步的M值也为1000或者100
Y # yes确认以上设定的参数
9 # 设定随机参数,输入奇数值。
```
2. dnadist.par
```sh
seqboot.out # 本程序的输入文件
T# 选择设定Transition/transversion的比值
2.3628# 比值大小
M #修改M值
D# 修改M值
100# 设定M值大小
2# 将软件运行情况显示出来
Y# 确认以上设定的参数
```
3. neighbor.par
```sh
dnadist.out# 本程序的输入文件
M
100 # 设定M值大小
9# 设定随机数,输入奇数值
Y# 确认以上设定的参数
```
4. consense.par
```sh
nei.tree#本程序的输入文件
Y #确认以上设定的参数
```
- `phylip`建树
```sh
# 在 phylip 文件夹下,依次运行下面的命令
# seqboot
./exe/seqboot < ./seqboot.par && mv ./outfile ./seqboot.out
# dnadist
./exe/dnadist < ./dnadist.par &&mv ./outfile ./dnadist.out
# neighbor
./exe/neighbor < ./neighbor.par && mv./outfile ./nei.out && mv ./outtree ./nei.tree
# consense
./exe/consense < ./consense.par && mv ./outfile ./cons.out && mv ./outtree ./constree
```
## 3. IQ-tree
(http://www.iqtree.org/ "IQ-TREE")的建树方法与`phylip`类似,只是最后一步不一样,同样需要先转换文件格式为:`phy`(格式转换见2.2)。
### 3.1. 安装
- 利用`conda`安装
```sh
# 新建iq-tree环境 并 安装iqtree
conda create -n iqtree -c bioconda iqtree -y
```
### 3.2. 建树
- `IQ-tree` 建树(简单)
```sh
iqtree -s test.phy
```
>> 替代模型选择与详细的分支评估,见http://www.iqtree.org/中说明
>>
> 上面三种示例程序运行过程中使用的参数,需要根据自身数据进行调整。
>
页:
[1]